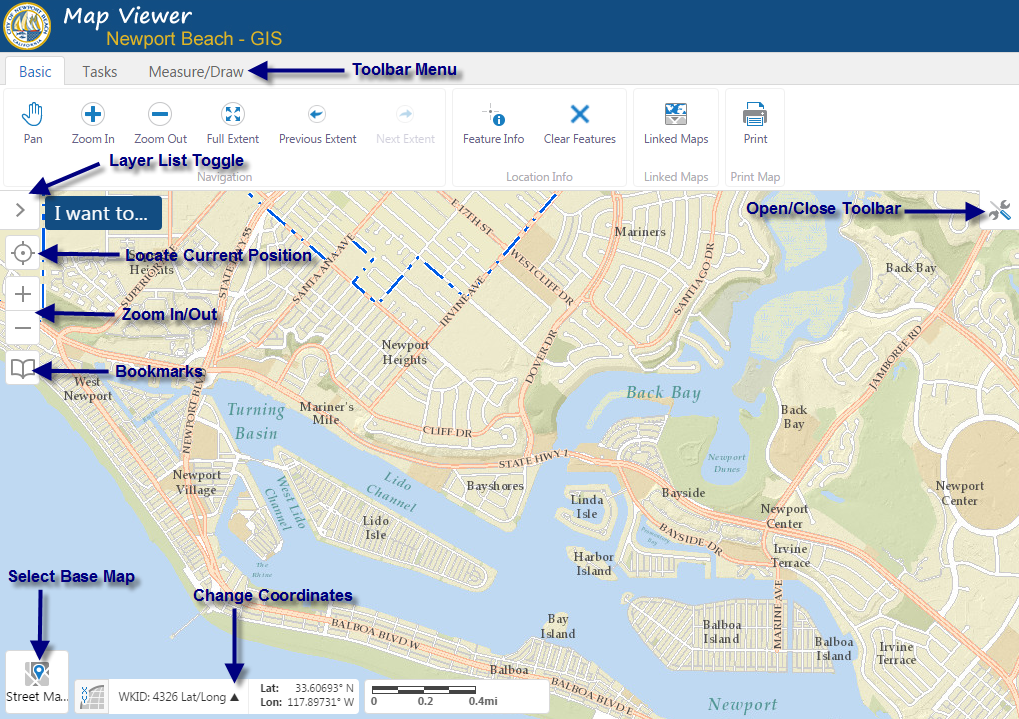
This guide is intended to introduce you to some of the new and more widely used features in the Newport Beach HTML5 Map Viewer. The look and feel of the map viewer should be familiar to previous versions,
with the advantages being that the new map viewer can be used in any web browser and on any mobile device, tablet, or desktop computer. While the map viewer will work in any browser,
it is highly recommended that you use a web browser other than Internet Explorer such as Chrome, Mozilla, or Safari web browsers. Below is the layout of viewer when it first loads.

1. Click on the "Street Map" icon in the bottom left corner to display other base map options.

2. Select "Aerial Imagery".

3. The aerial images will display and a timeline slider will appear allowing you to transition between years.


2. Select "Aerial Imagery".

3. The aerial images will display and a timeline slider will appear allowing you to transition between years.

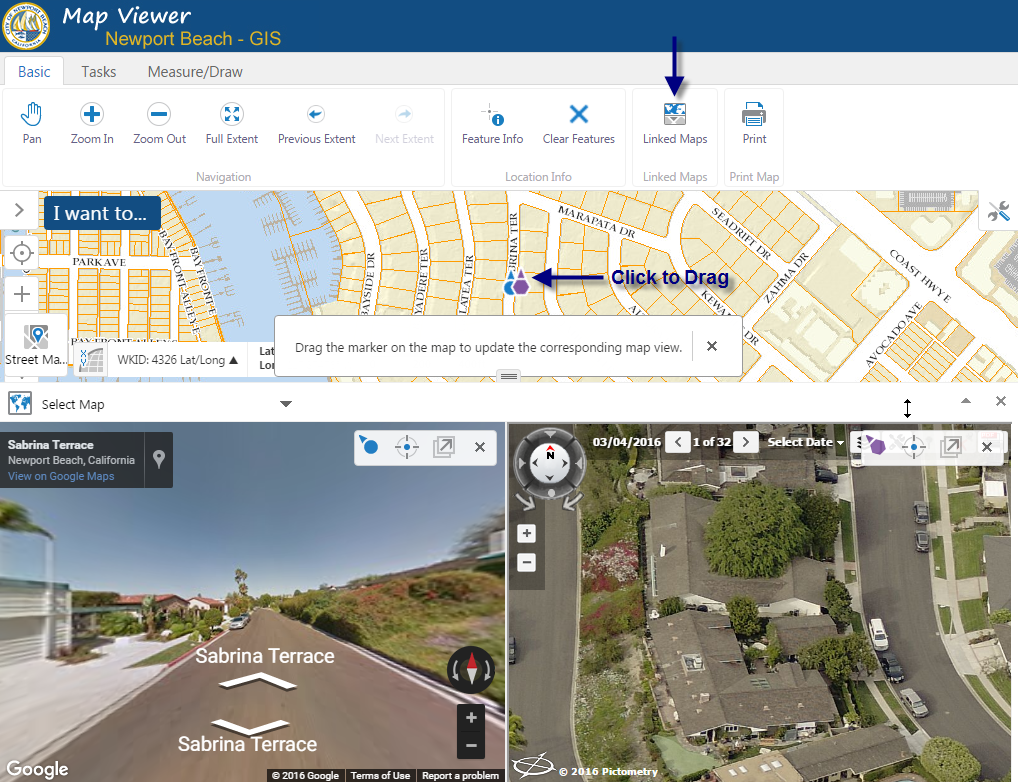
Center the map to the area you'd like to view in Google Street View and Pictometry and click on the "Linked Maps" tool. The Google Street View and Pictomety windows will open inside the viewer and are sync'd
with the map, as indicated by the markers which appear on the map. These markers can be dragged around on the map to view a different area.
 (Note that this feature works best in a web browser other than IE.)
If you pan the main map window to a different location or perform an "Address Search" you will need to recenter the linked maps so the view in those windows reflects the current location of the map.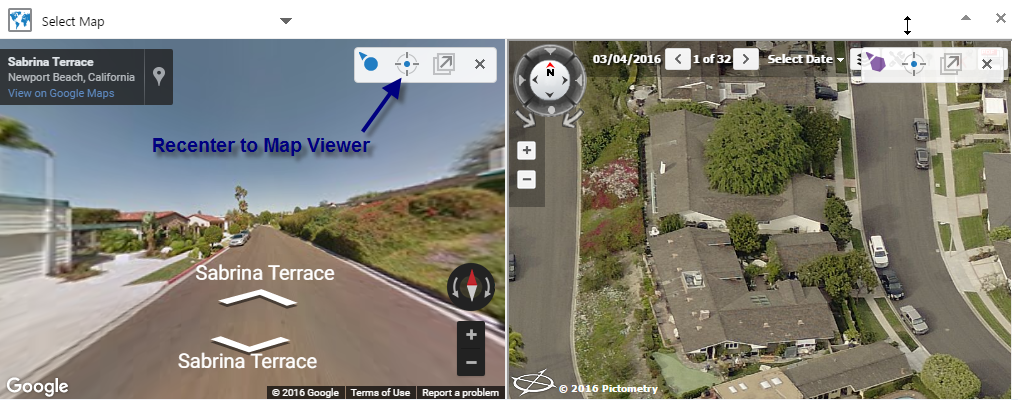
 (Note that this feature works best in a web browser other than IE.)
If you pan the main map window to a different location or perform an "Address Search" you will need to recenter the linked maps so the view in those windows reflects the current location of the map.

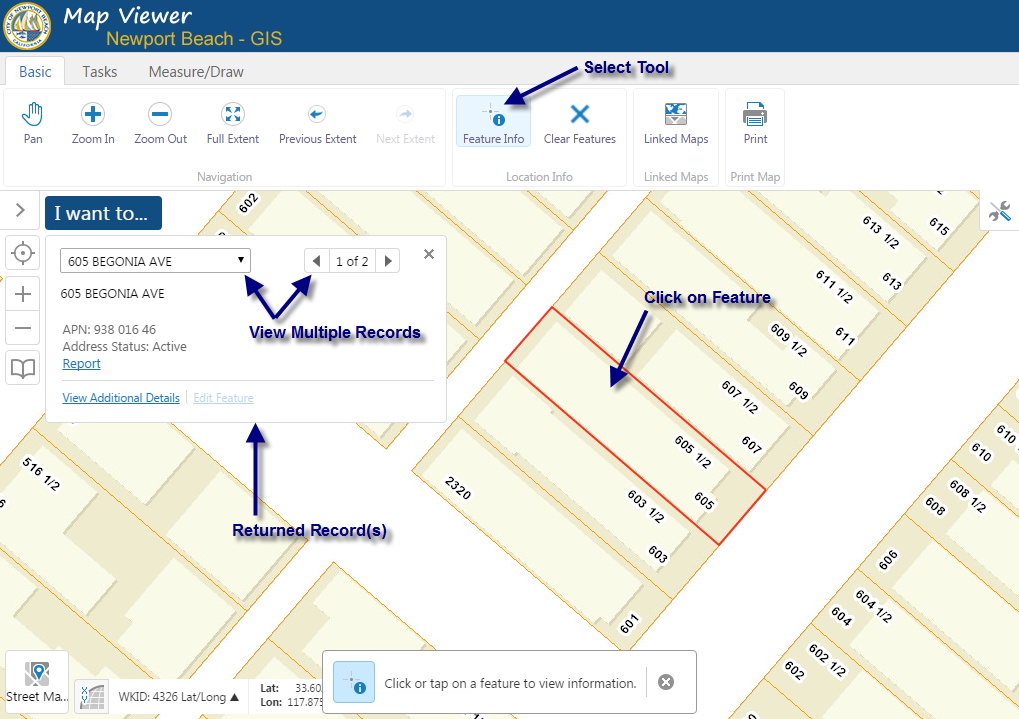
Select the "Feature Info" tool and click on the feature you'd like to view information for.
The more tradional "Identify" tool can be found under the "Tasks" menu, within the "Find Data" toolset.

The more tradional "Identify" tool can be found under the "Tasks" menu, within the "Find Data" toolset.
1. Select the "Measure/Draw" toolbar and then select if you want to measure by "Distance" or "Area".

2. "Enable Snapping" and select which layers to snap to if you want a more accurate measurement. The measurement shown below was snapped from the hydrant to the corner of the lot.


2. "Enable Snapping" and select which layers to snap to if you want a more accurate measurement. The measurement shown below was snapped from the hydrant to the corner of the lot.

1. Select the "Measure/Draw" toolbar and then select what type of markup to add to the map.

2. Open the "Styles" palette and select size, color, etc.

3. Add markup to map and if needed, use the "Edit" toolset to manipulate or erase the markup.
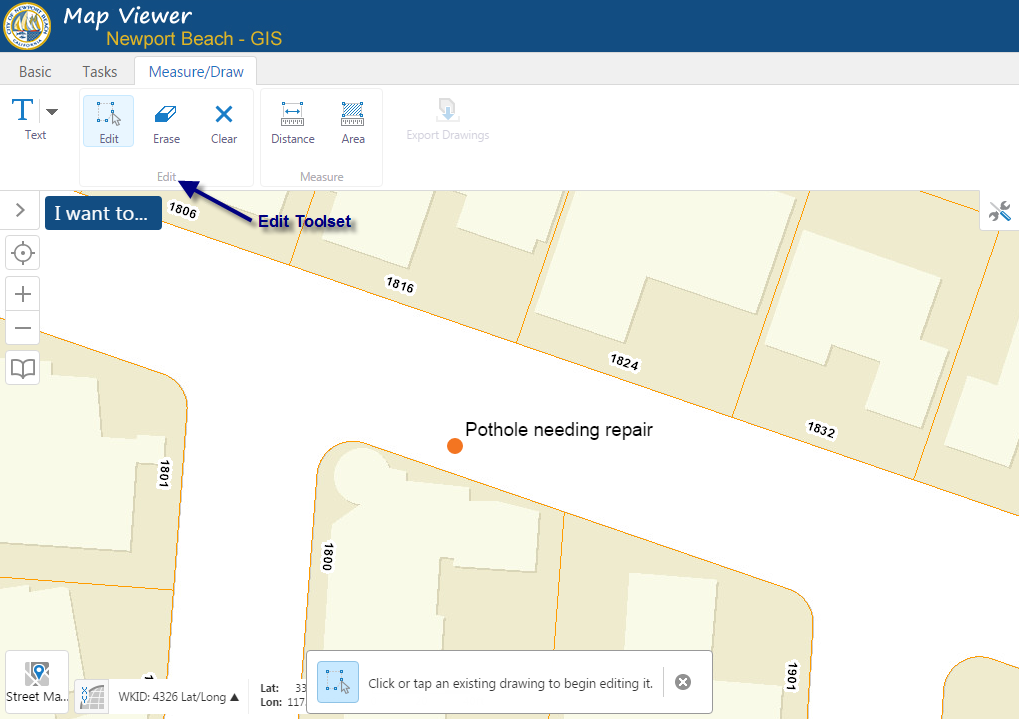

2. Open the "Styles" palette and select size, color, etc.

3. Add markup to map and if needed, use the "Edit" toolset to manipulate or erase the markup.

1. Add markup to the map if needed and then click the Map Correction Tool.
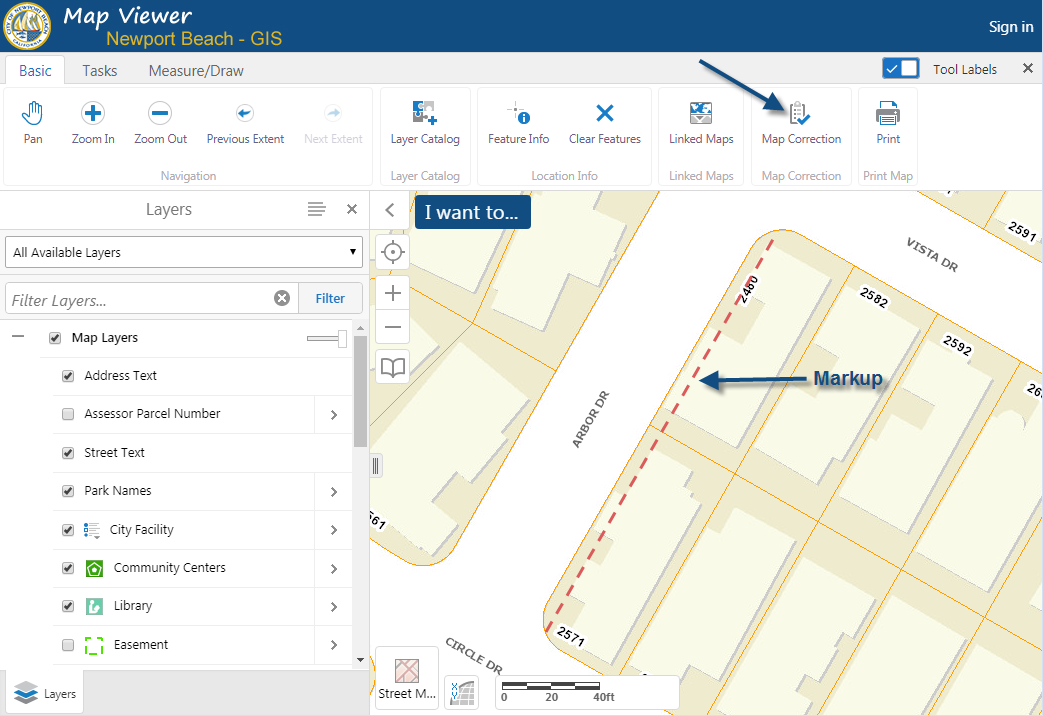
2. Enter your name and then a brief description of what needs to be corrected or questions you may have.
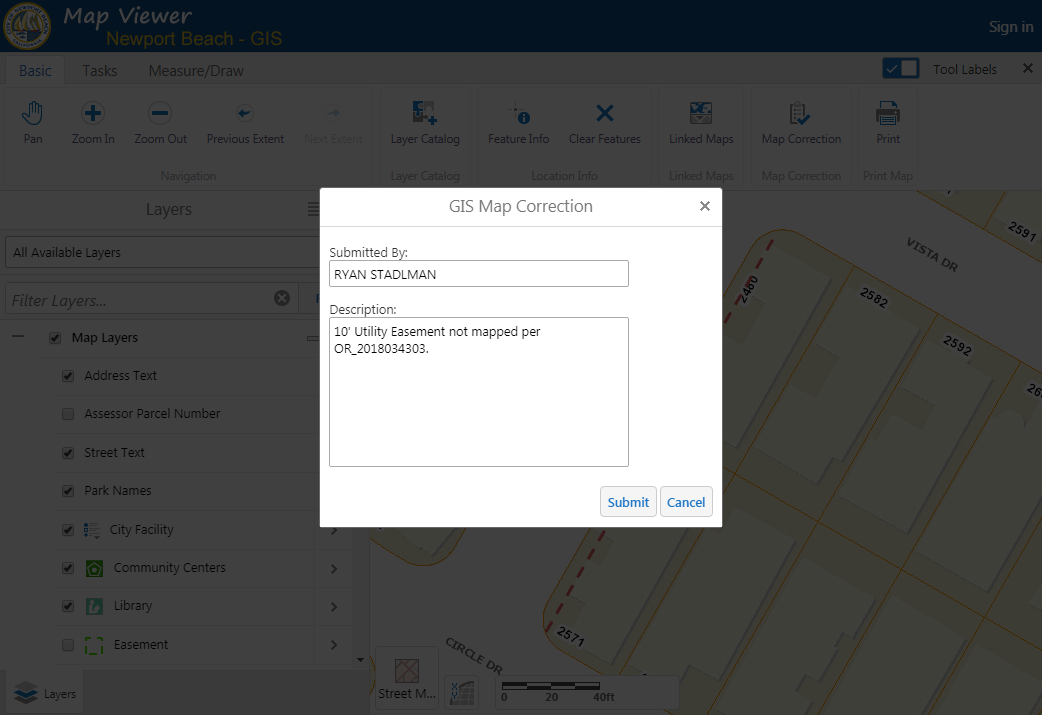
3. After clicking Submit, a screenshot will be captured and attached as part of the submission to the IT Help Desk where GIS will then be notified. Once the correction has been completed, a confirmation email will be sent notifying you of its completion.

2. Enter your name and then a brief description of what needs to be corrected or questions you may have.

3. After clicking Submit, a screenshot will be captured and attached as part of the submission to the IT Help Desk where GIS will then be notified. Once the correction has been completed, a confirmation email will be sent notifying you of its completion.
The "Layer List" allows you to toggle layers and groups of layers on and off, as well as view the map legend.
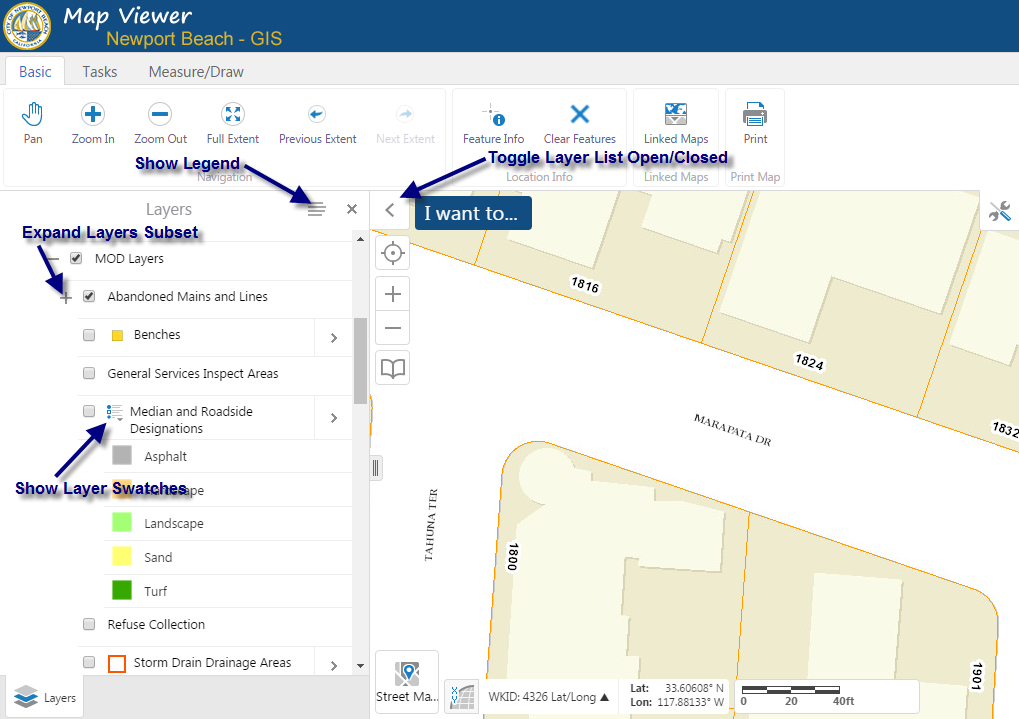

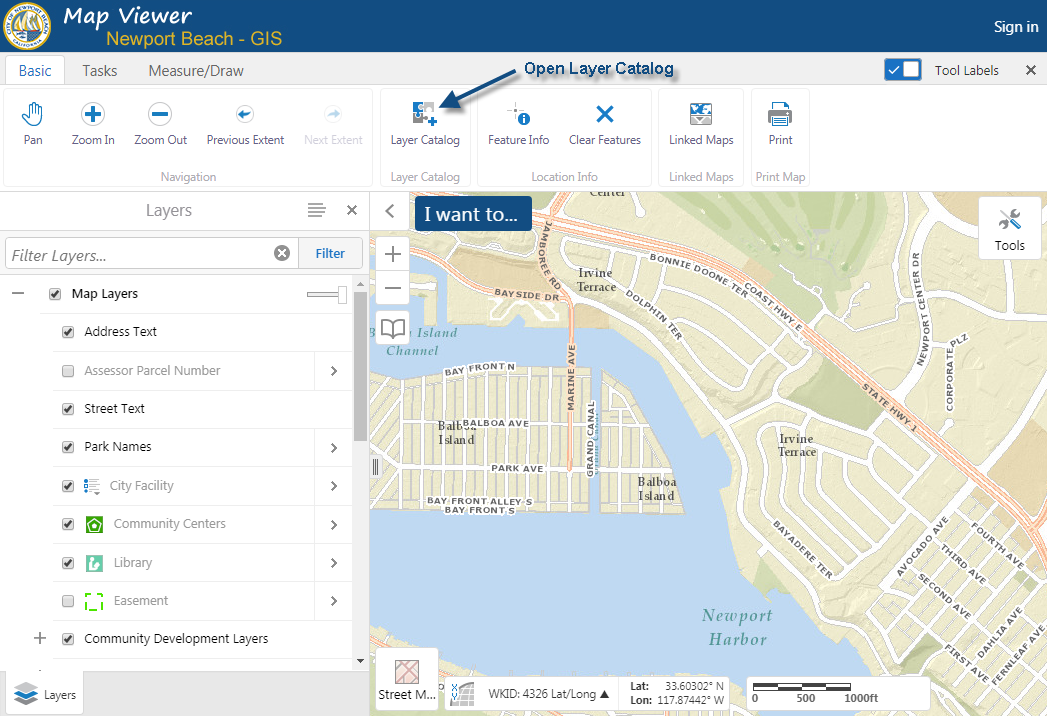
1. Click on the "Layer Catalog" button to load additional layers to the map viewer.
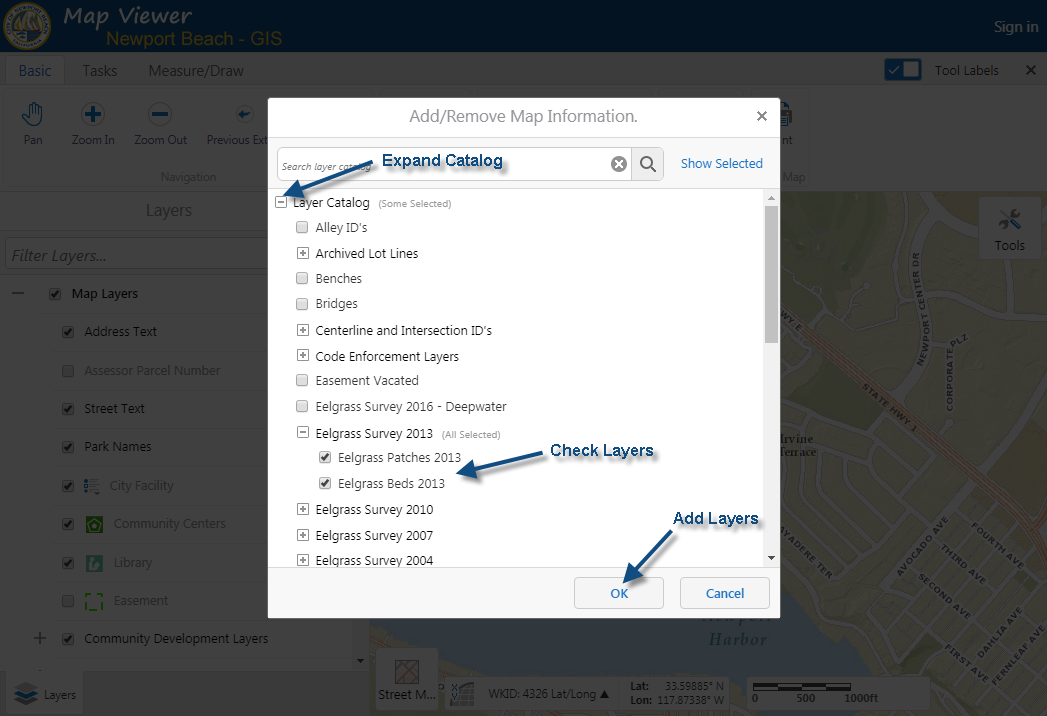
2. Expand the Layer Catalog, check the layers to add, and click "OK".
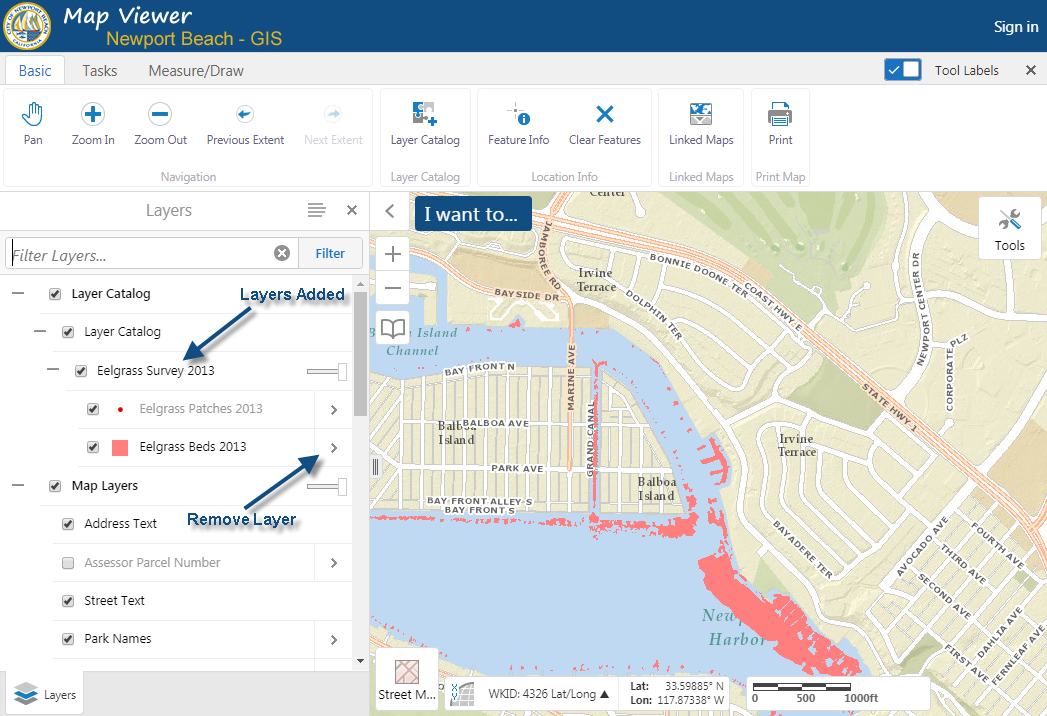
3. The layers are added to the map viewer and the top of the layer list.

2. Expand the Layer Catalog, check the layers to add, and click "OK".

3. The layers are added to the map viewer and the top of the layer list.

